
IoT Based Heartbeat Monitoring System Project using Raspberry Pi
An automated watering system, controlling a relay via a soil moisture sensor. This starts off running just on your device, then moves to a free MQTT broker to add cloud control. It then moves on again to cloud-based IoT services to add features like security to stop Farmer Giles from hacking your watering system.

How to measure temperature and send it to AWS IoT using a Raspberry Pi
Raspberry Pi Particle Photon Particle Electron Arduino C.H.I.P. ESP8266 Windows Linux Onion Omega PyCom CATEGORIES Pressure Sensors Modular Pressure Sensors Temperature & Humidity IoT Temperature & Humidity Sensors Barometers IoT Barometric Pressure Sensors Current Monitoring Industrial Current Monitoring Devices Gas Sensing Modular Gas Sensors
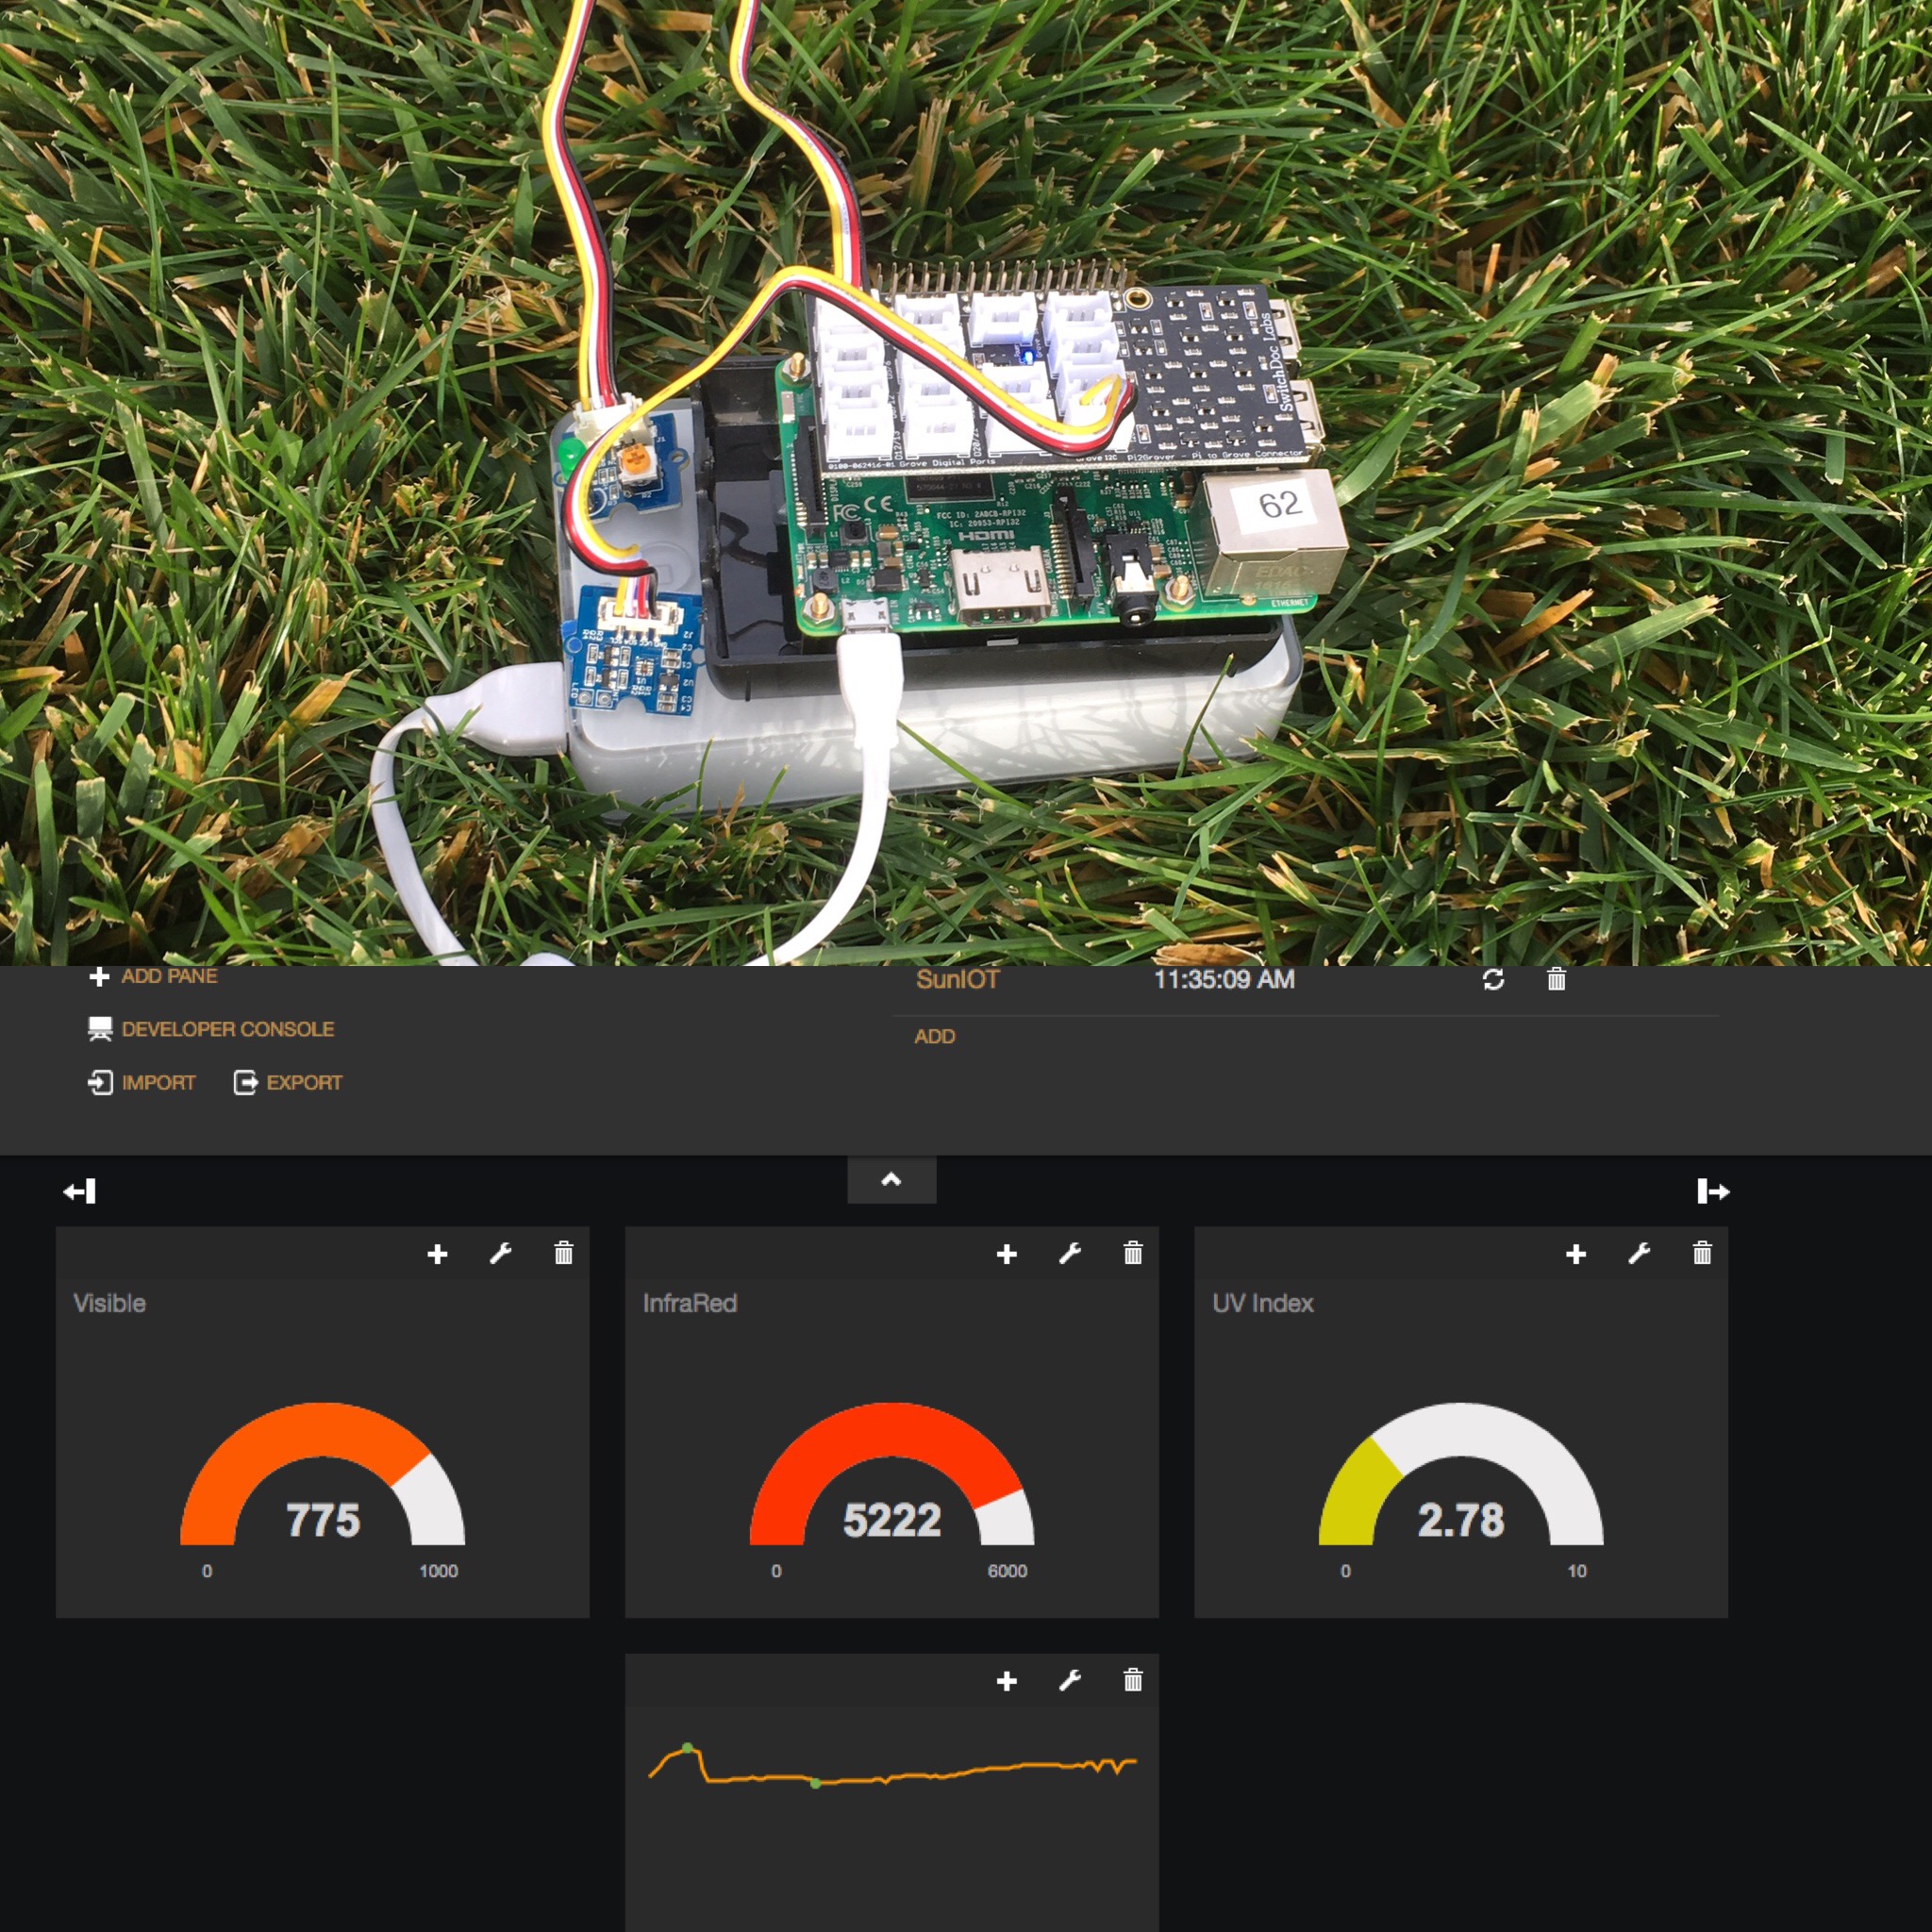
MQTTSimple IOT Sunlight Sensing Raspberry Pi Project SunIOT Part 4 SwitchDoc Labs
Many IoT starter kits for the Raspberry Pi include temperature and humidity sensors, and plenty measure air pressure as well. This is all the hardware you need to get started. Once you have the board set up and the sensors in place, there are a lot of things you can do with the data. You could set it up to communicate with a web server and give.
How to Build a Raspberry Pi Motion Sensor IoT Tech Trends
Then click on " New Dataset ". Choose the " AWS IoT Analytics " data source. Choose your " Dataset" and then click on " Create data source". Then, click on " Visualize ". Under visual types choose your preferred " Visual Type". We will be using "line chart" and drag & drop your data into the respective axes.
Raspberry Pi based IOT Security and Surveillance System with motion OS PART 2 Let's Learn IOT
This article describes and summarizes over 50 of the most important sensors and components for Raspberry Pi's as well as Arduinos and provides you with a full Raspberry Pi sensor list. Menu The described Raspberry Pi sensors, modules and components are divided into the following categories: Temperature / Humidity / Air Pressure / Gas Motion Sensors
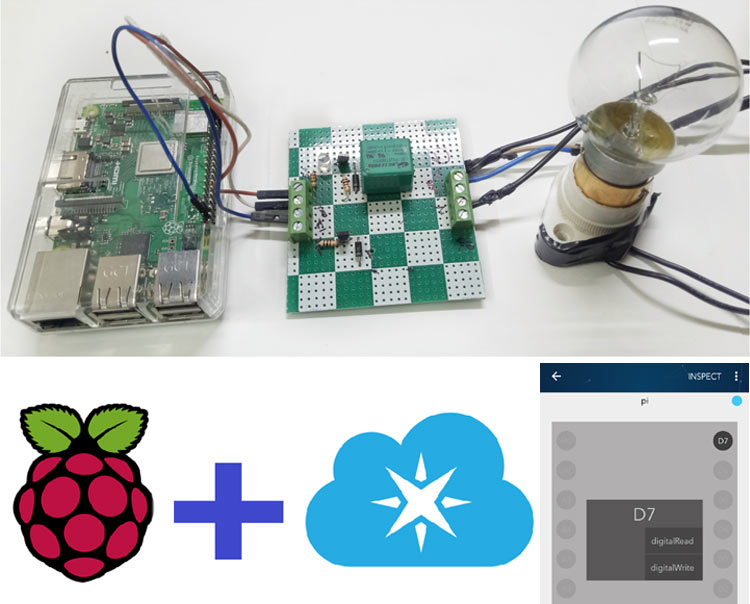
Raspberry Pi Sensor IoT Project Nick Mariano
Introduction to IoT Using the Raspberry Pi By Wei-Meng Lee and Clarence Chng Published in: CODE Magazine: 2016 - July/August Last updated: August 31, 2022 One of the buzzwords used heavily in the IT industry for the past couple of years is the term IoT, which stands for Internet of Things.
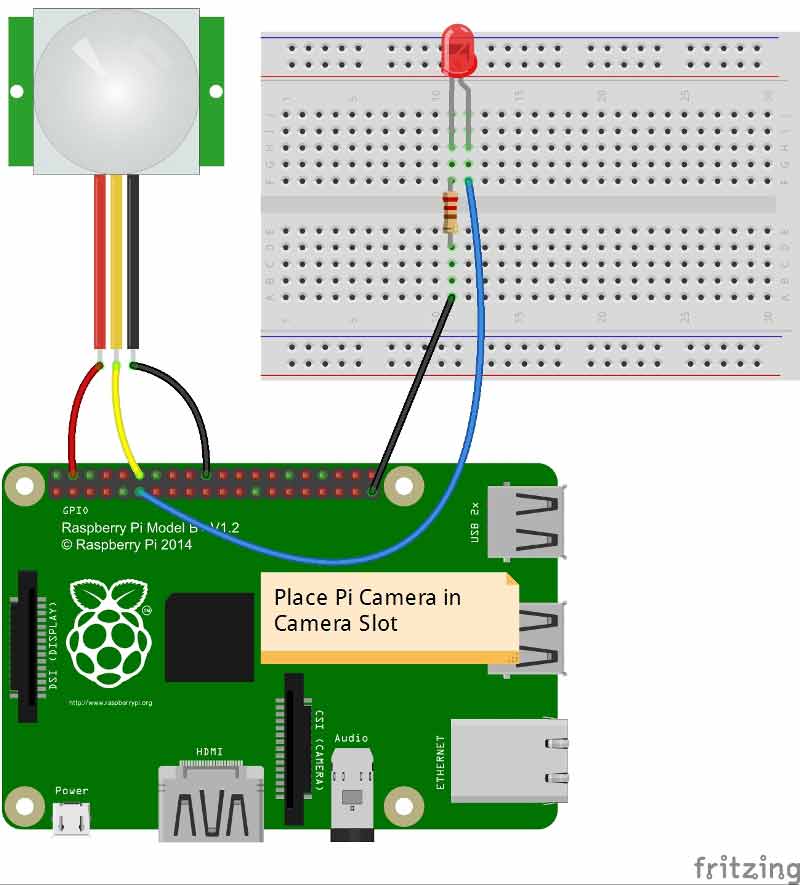
IOT based Raspberry Pi Home Security System with Email Alert using Pi Camera & PIR Sensor
Once it is installed, configure it as a systemd service so that it automatically starts and stops with the Raspberry Pi. Install Python sensor libraries. Raspberry Pi OS comes with Python 3, but it does not include the libraries required to interact with the sensors. Fortunately, there are Python libraries available.
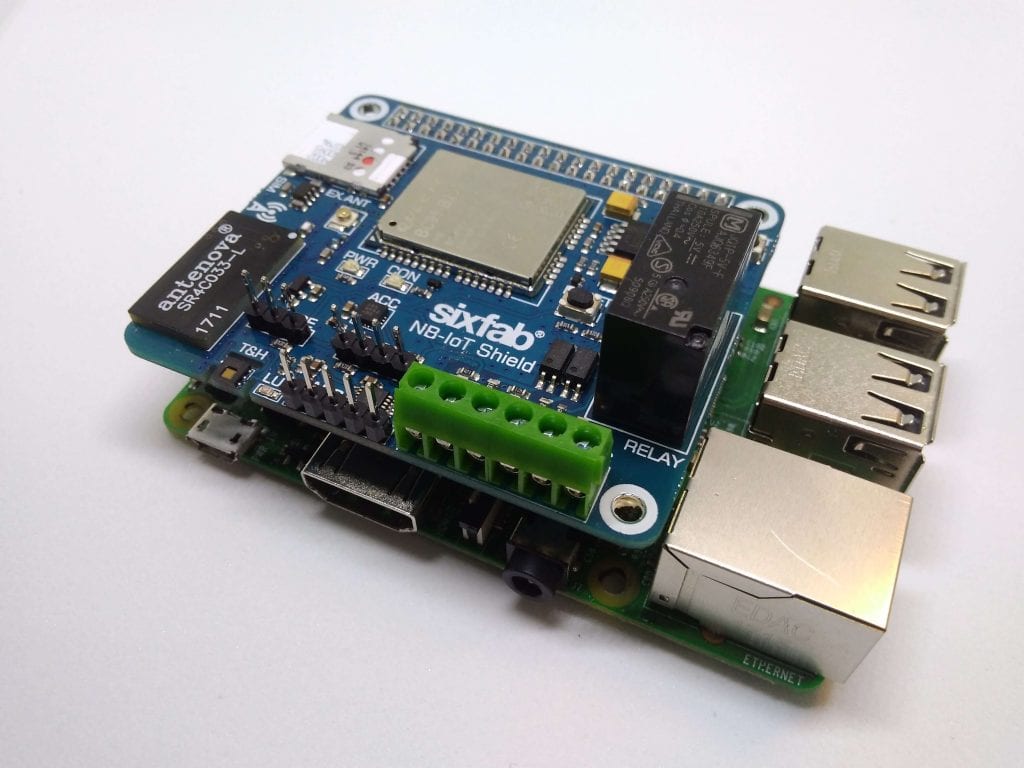
Monitoring sensors of Sixfab Raspberry Pi NBIoT Shield Sixfab
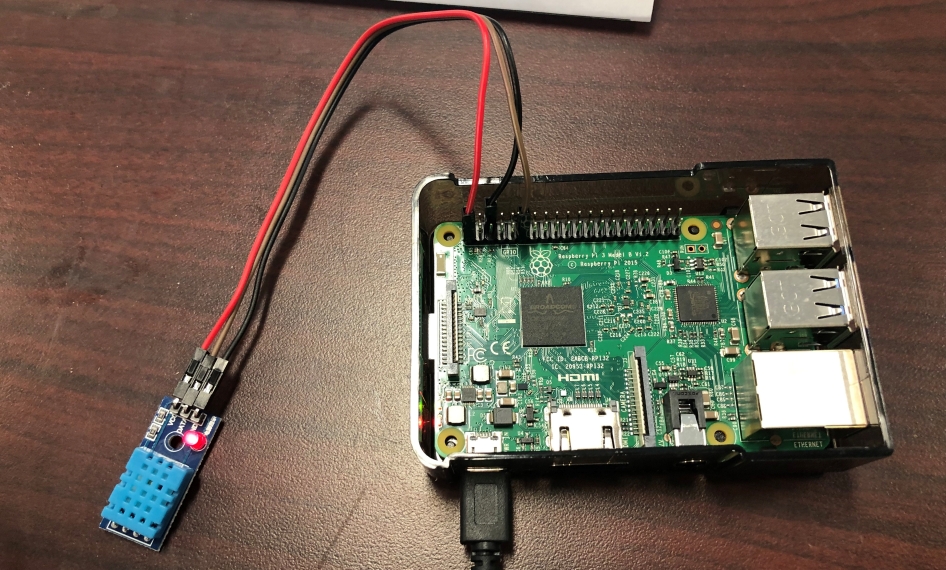
To begin with, we need to set up a temperature reading sensor. We connect it to an Arduino which connects to a RaspberryPi. The next step is to set up AWS IoT SDK on your Raspberry Pi. Setup the Thing. Create a thing in AWS IoT: 2. Create a single thing to begin with: 3. Create a thing of a particular type.
Iot Projects For Cse Students Using Raspberry Pi Raspberry
There are at least eight reasons for using IoT with Raspberry Pi: Affordability Versatility Computing power Connectivity GPIO Pins Community support Security Compatibility 1. Affordability (Popular reason for Raspberry Pi IoT) One of the most compelling motives for using a Raspberry Pi in IoT projects is its affordability.

Tutorial 4 Introduction to Sensor Interfacing with Raspberry Pi IoT Tutorials YouTube
IoT, on the other hand, refers to the network of physical devices, vehicles, appliances, and other objects embedded with sensors, software, and connectivity to enable them to collect and exchange data. These devices can be remotely monitored and controlled, opening up a world of possibilities for automation, data analysis, and smart solutions.

LTE NBIoT HAT for Raspberry Pi Includes Sensors and Relay Sixfab
Raspberry Pi is a development board that can be applied to build IoT applications. Various sensors and actuator devices can be attached to the board. In this chapter, we explore Raspberry Pi and cover its models. We also learn how to set up the board for the first time.
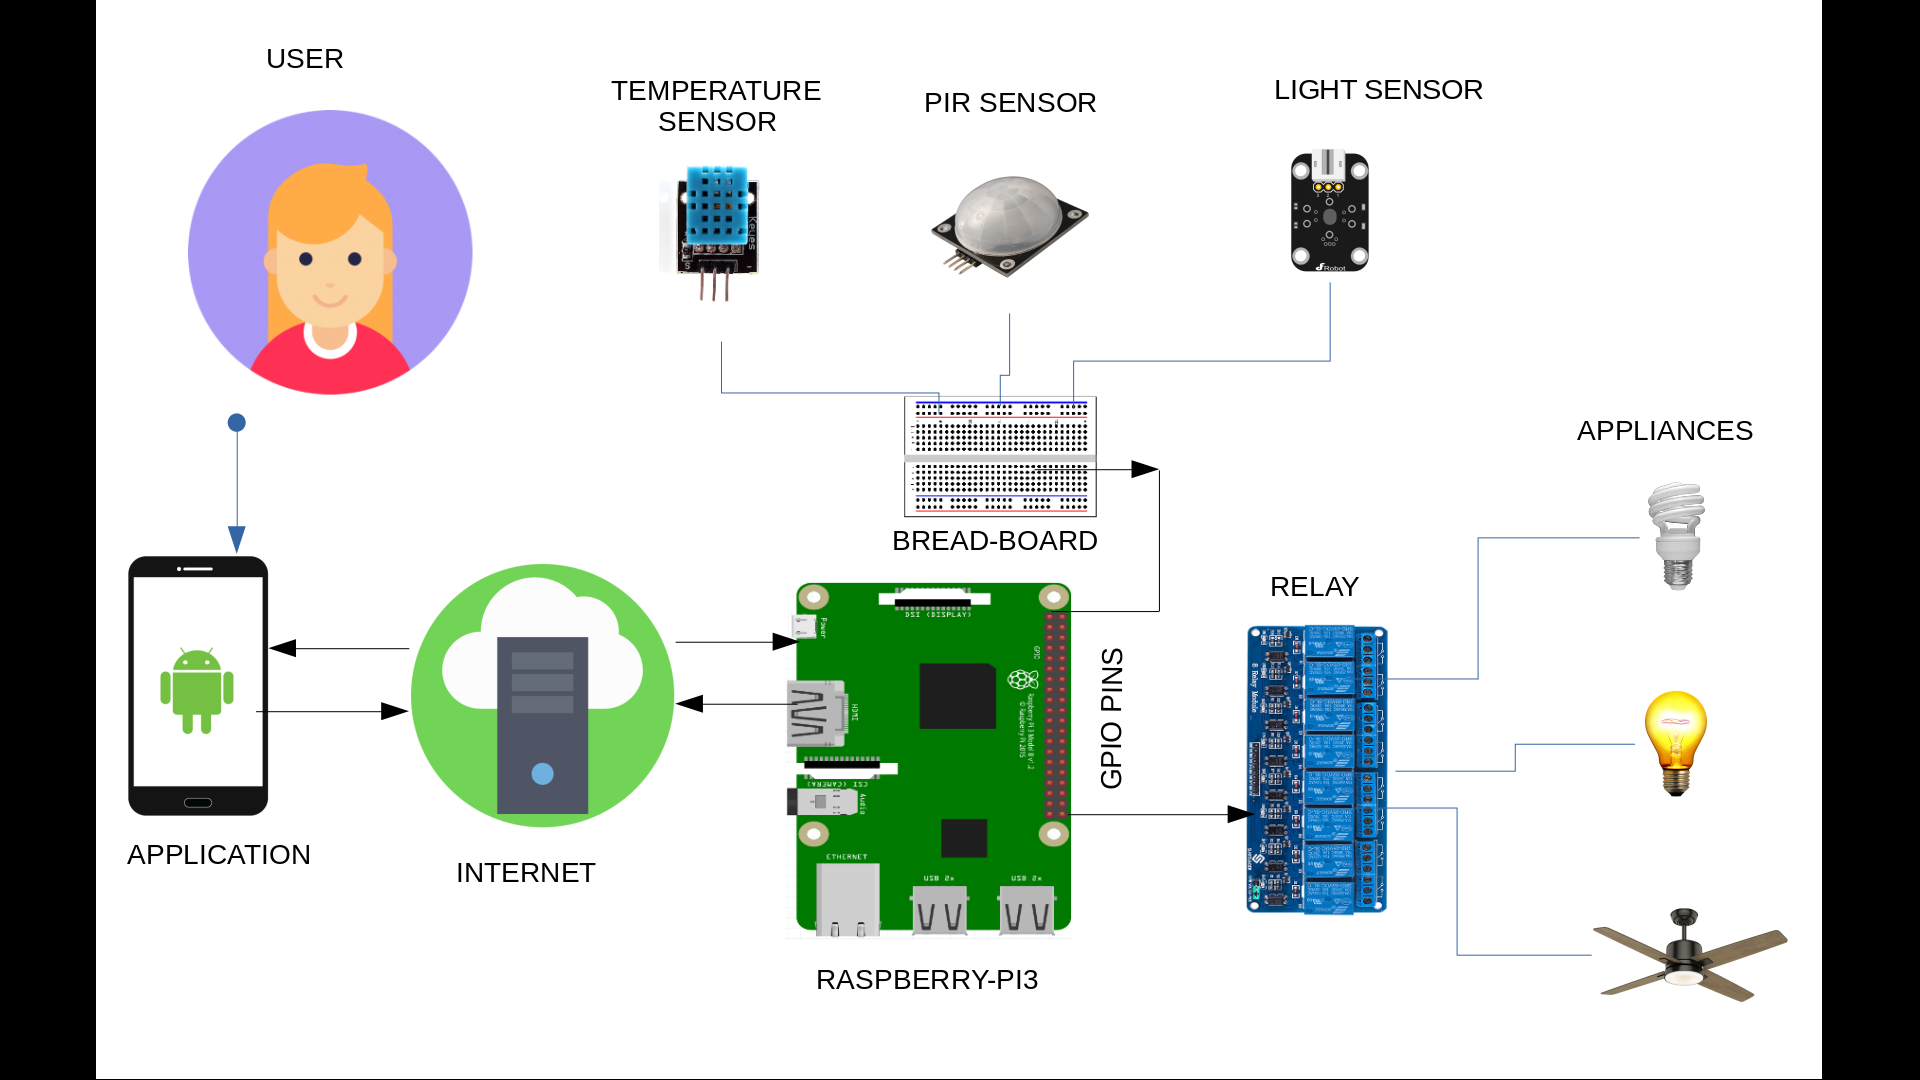
Of THINGs Raspberry Pi Home Automation System based on IoT by mahima sachan Medium
The 10 Best Raspberry Pi IoT Projects By Cherie Tan Updated Jul 30, 2022 Want to make an Internet of Things project with your Raspberry Pi? Check out these inspiring IoT ideas. Image Credit: Hacker Shack/ YouTube Readers like you help support MUO. When you make a purchase using links on our site, we may earn an affiliate commission. Read More.

Iot Based Smart Surveillance Security System Using Raspberry Pi Raspberry
Step 1: Create the AWS IoT policy Create an AWS IoT policy that allows your Raspberry Pi to connect and send messages to AWS IoT. In the AWS IoT console, if a Get started button appears, choose it. Otherwise, in the navigation pane, expand Secure, and then choose Policies.

Raspberry Pi Powered IOT Garden 18 Steps (with Pictures) Instructables
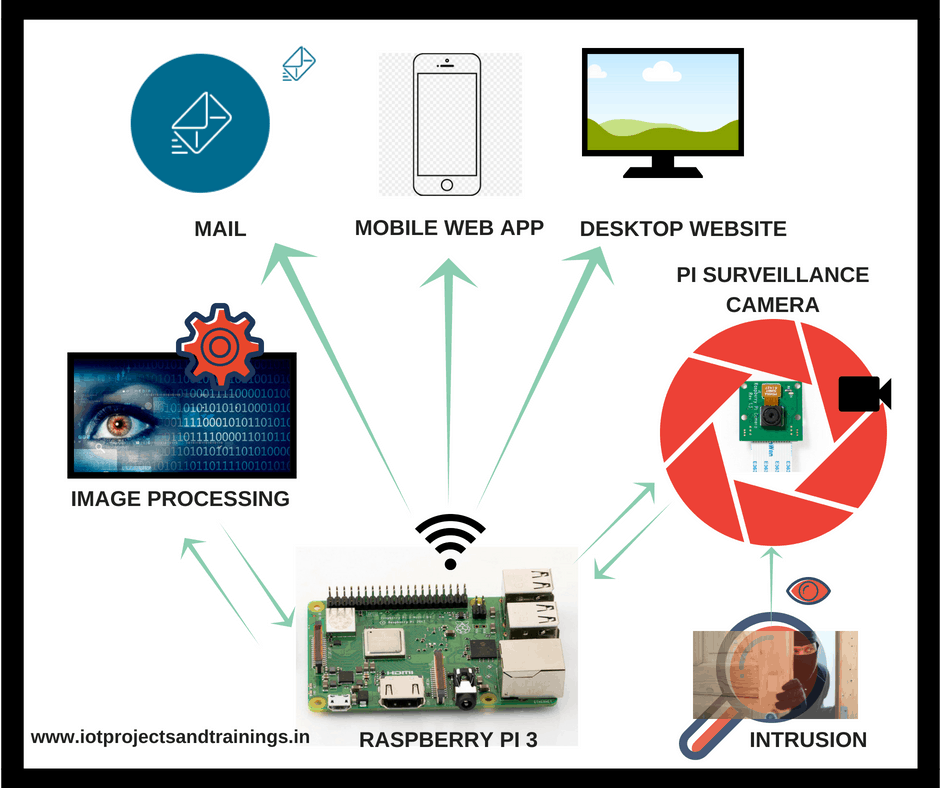
The Raspberry Pi is interfaced with a temperature sensor and PIR sensor and reads data from it through its GPIO pins. After this, the data is relayed to a web server and subsequently pushed to your Android device through the Google Cloud Messaging (GSM) service. A brief outline of the process: Raspberry Pi ↓
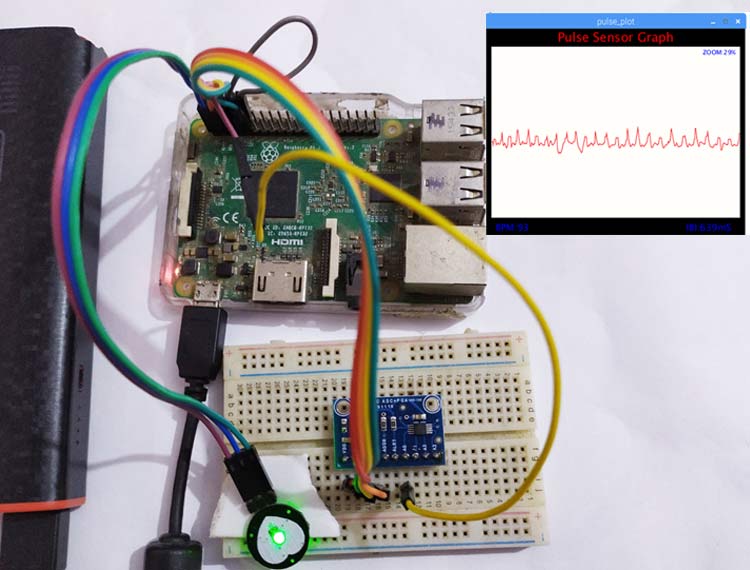
IoT Based Heartbeat Monitoring System Project using Raspberry Pi
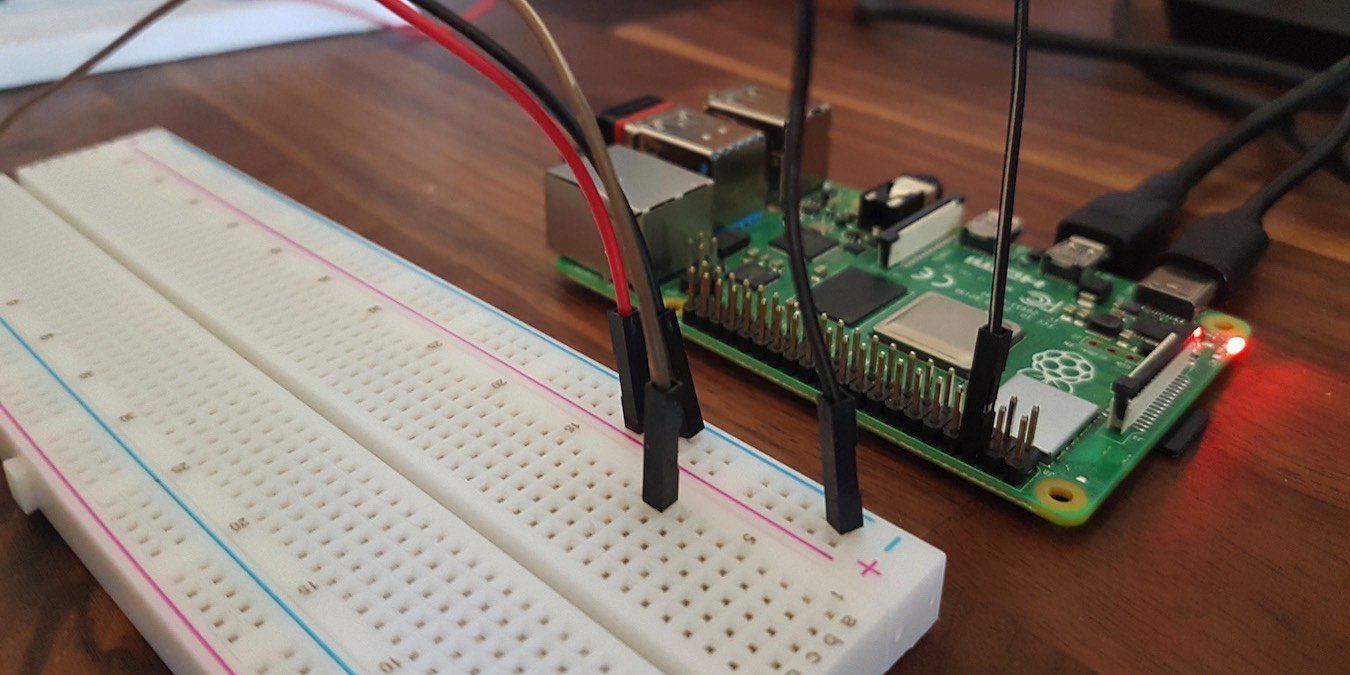
Step 1: What You Need to Complete This Project Lets get started on building our project. We will build this on a breadboard, so no need to worry about soldering, or a designing pcb. Once we are happy with the design we can do that. Hardware: - Raspberry PI 2 & SD Card with Raspbian Operating System - USB Power Supply - USB Cable

What Is Windows Iot Raspberry Pi 3 Raspberry
Create an account. Go to the control panel in top right corner. Click on the "create" button. Enter CMQTT in the "name" field. On the same page, in manage users add a user with: Name: pi. Password: pi. Click on "save". Again on the same page at the end, add:
